When you reach the end of a PC's useful life, there are several things you should do before disposing of it. The most important thing to do is to completely wipe any hard drives that are installed in the computer. Disk drives contain lots of private information that a user cannot necessarily see at first glance. If you make sure to completely clean the drive at the end of its useful life, you can make sure your private information remains out of the hands who would use it for harmful purposes.
Hard drives contain personal information such as family photos, professional documents, and sometimes even more sensitive information like social security numbers, bank statements, and credit card numbers. It is very important to completely erase all data from your computer and hard drive before either recycling it or passing it along to another party. This prevents any sensitive information from getting into the hands of malicious actors who would use the information in a harmful way.
Many people believe that simply deleting information from the drive is sufficient, but that could not be further from the truth. When deleted, the operating system simply hides the data and moves it to another location such as the Recycle Bin. Files can easily be retrieved from the Recycle Bin and often times meta data is left over on parts of the drive that expose sensitive information.
How to Erase and Re-Format a Drive in Windows 10
To prevent old files from being retrieved from your disk drive, follow these steps to wipe it clean at the system level. This requires a number of steps but will ensure you permanently delete all information from your computer and can safely move it along to either a new owner or the recycling bin.
Here are the steps to follow to wipe your hard drive in Windows 10:
- Select Start (Windows icon) at bottom left of your screen
- Select Settings (the gear icon on the Start menu just above the Windows icon).
- Select Update & Security
- Select Recovery
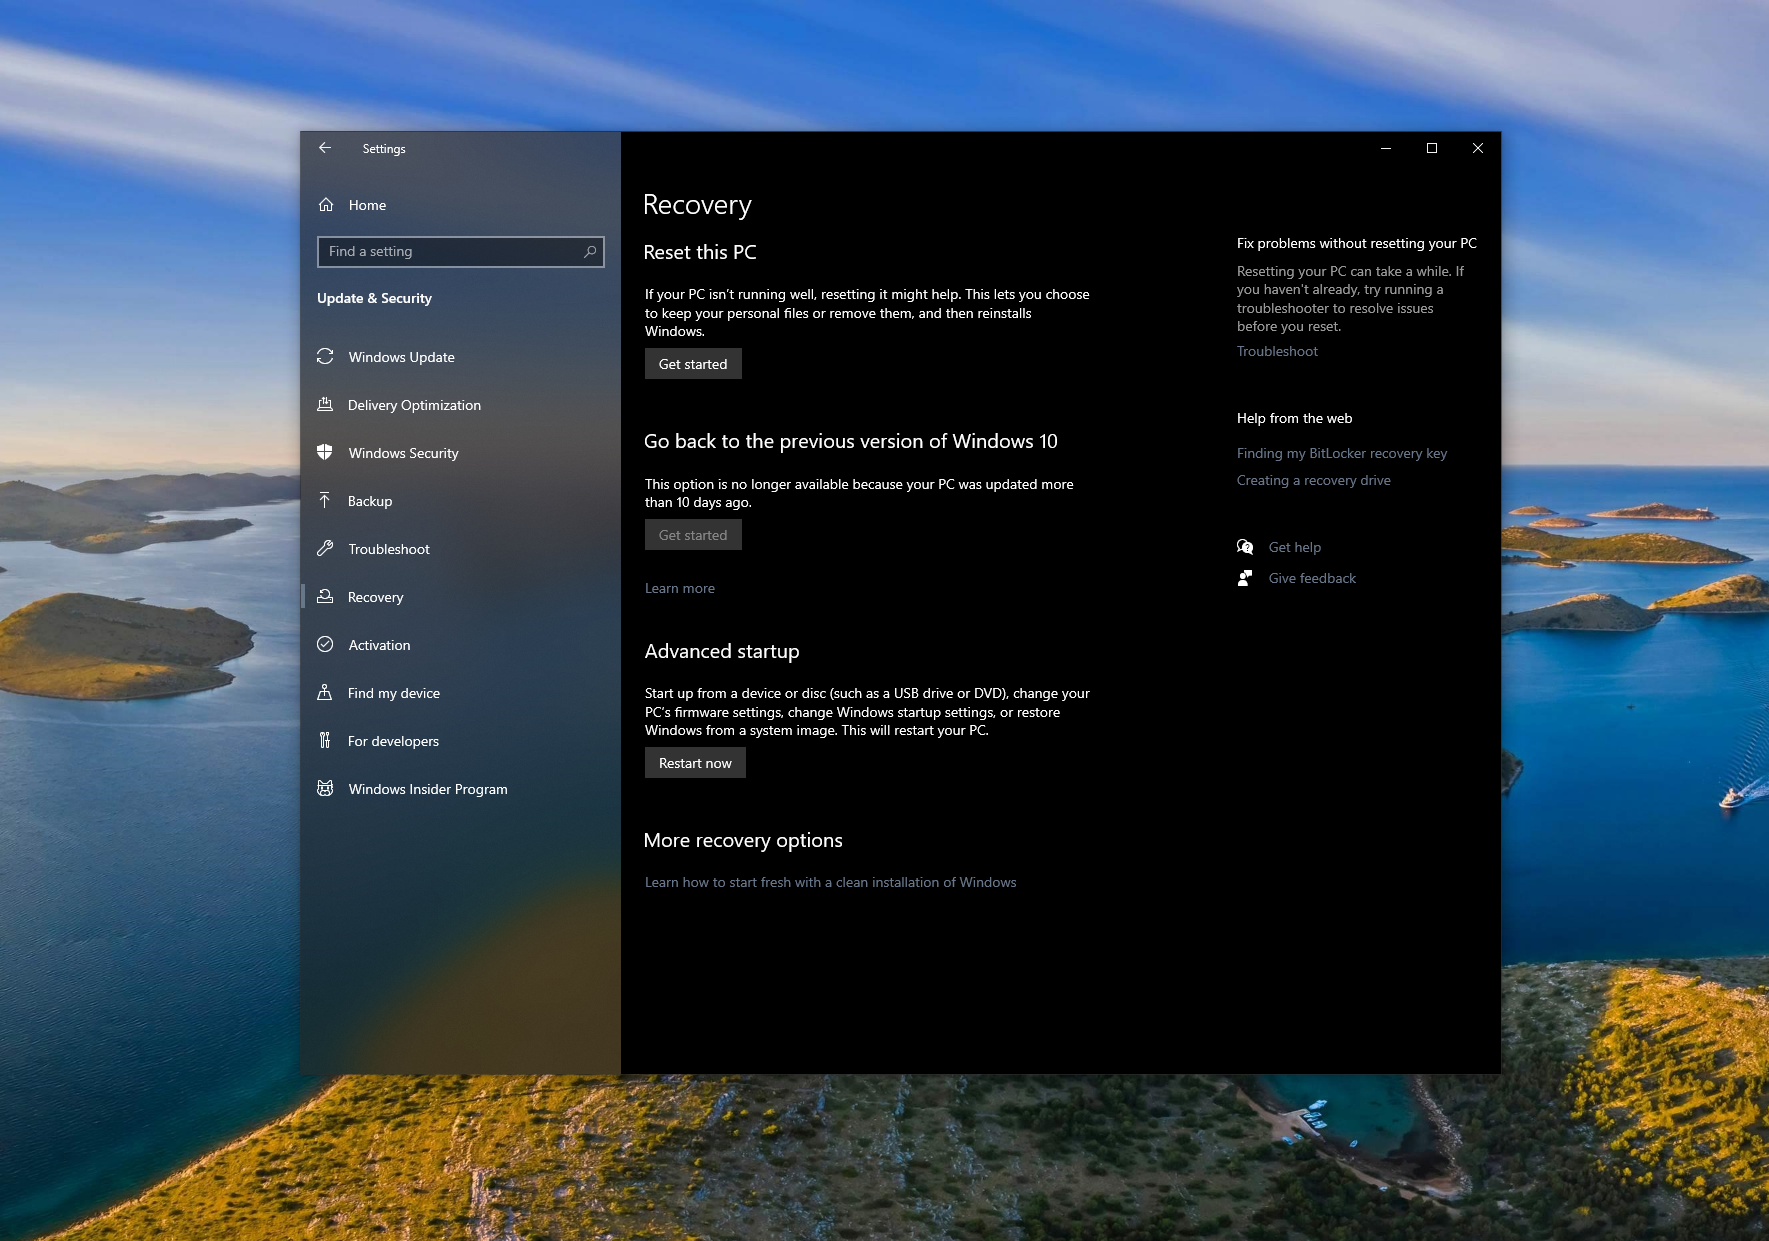
5. This brings you to the Recovery screen where you can choose from a few options. We want to Reset this PC -> Remove everything
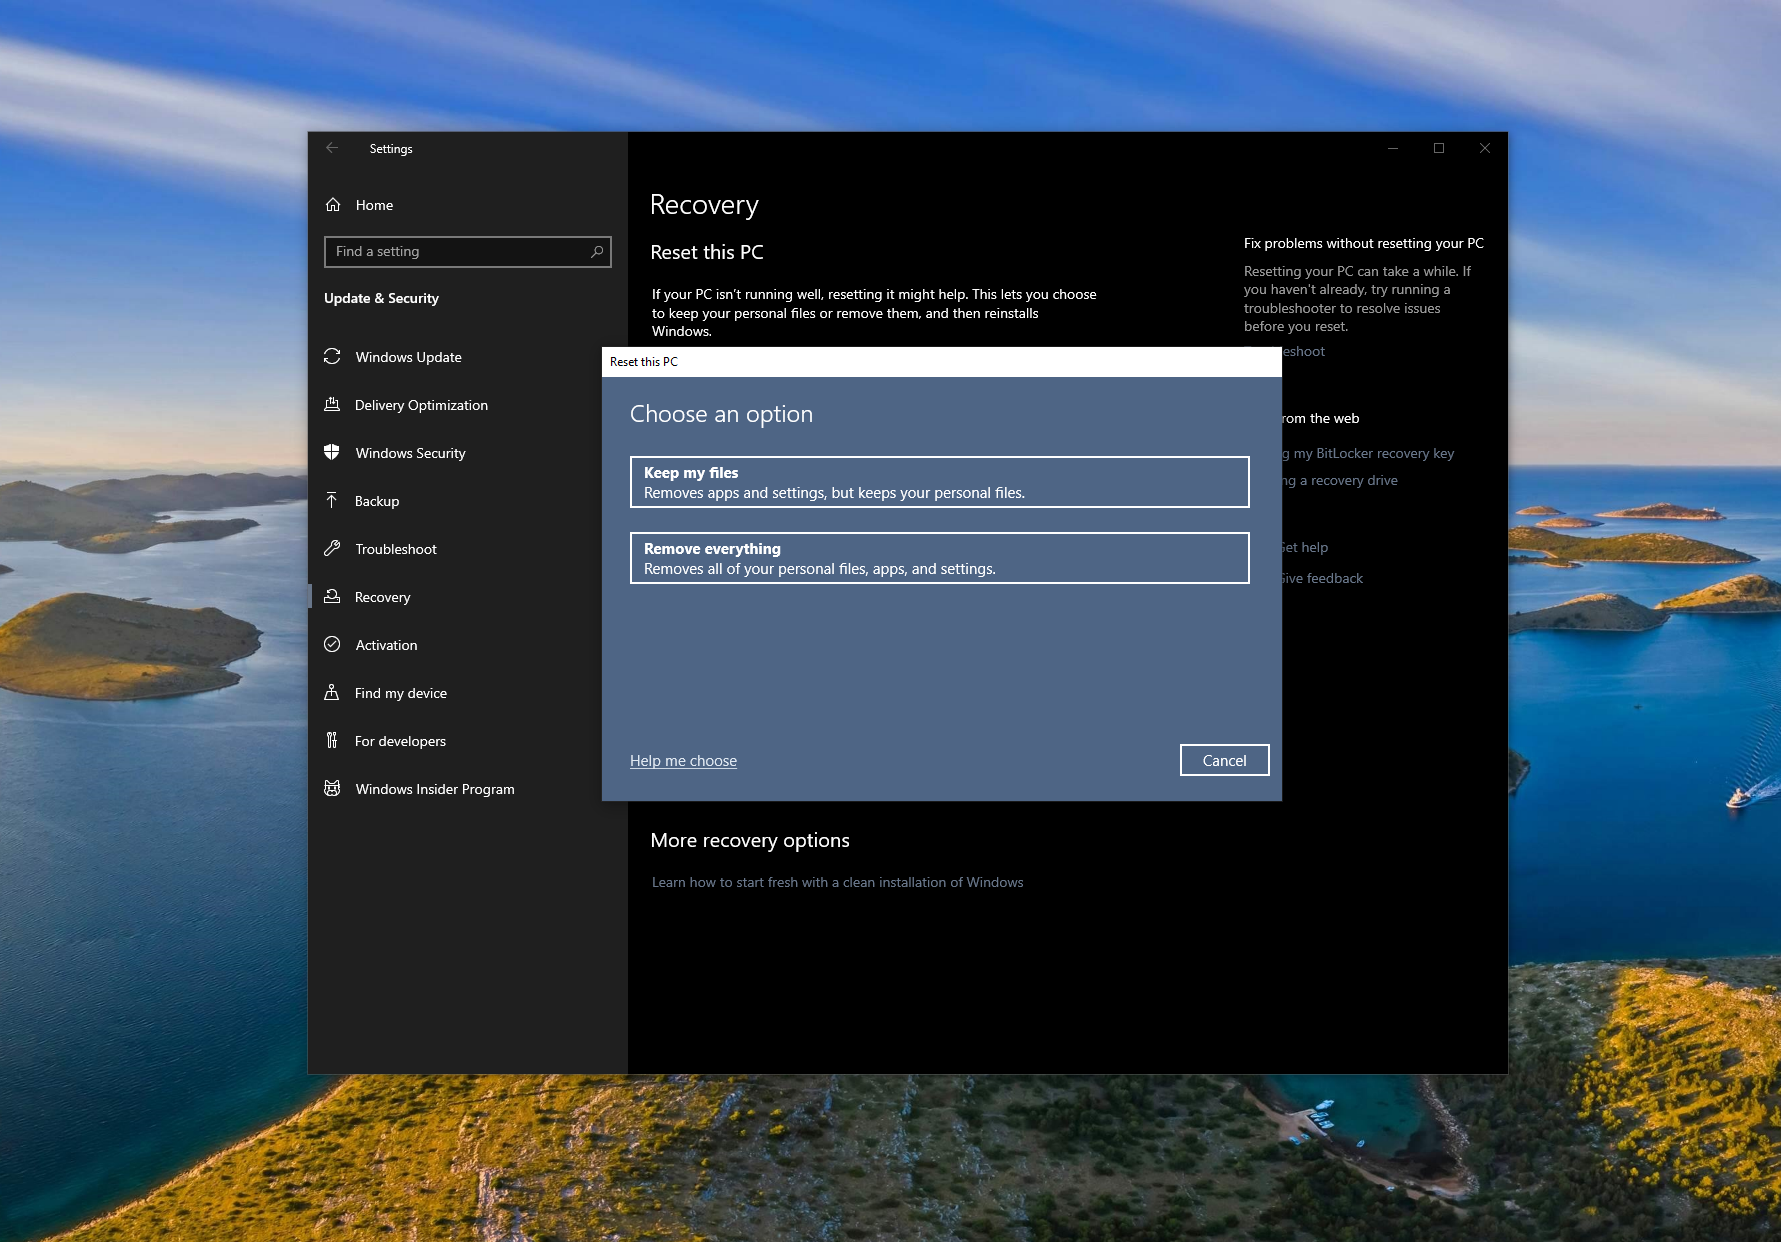
6. Once the process completes, choose the Local reinstall option in order to reinstall Windows to your computer. This will reinstall a clean version of Windows 10. At this point your PC is ready to be moved on or your hard drive is ready to be recycled!
Thank you for reading our handy guide to wiping your hard drive in Windows 10. Please be sure to check out some of our other articles for Windows 10: