

Mac computers have been widely considered more secure than Windows PC's for years. Over the last decade, however, a growing number of people have begun to doubt the security of Macs. As the user base of Apple computers has grown, so have the number of nefarious people that create viruses and malicious software for them. Developers who write viruses naturally want them to affect as many computers as possible so as the number of Mac users has grown, as have the number of viruses written to attack them.
Protecting Against Malware in MacOS
Apple does a great job of protecting their users from malicious attacks with built-in security measures in both their hardware and software. Lets explore just a few of these important measures Apple has put in place to protect their owners.
Apple has implemented three layers of initial defense against attacks on your Mac computer:
Notarization
Many apps that developers write for Macs are distributed on the Apple App Store. Often times though, an app developer needs to host their own distribution of their apps. Notarization is a malware scanning service that Apple runs when an app developer distributes an app outside of the App Store.
Here is an excerpt from Apple's Platform Security page that describes how Notarization works:
Notarization is a malware scanning service provided by Apple. Developers who want to distribute apps for macOS outside the App Store submit their apps for scanning as part of the distribution process. Apple scans this software for known malware and, if none is found, issues a Notarization ticket. Typically, developers staple this ticket to their app so Gatekeeper can verify and launch the app, even offline.
Gatekeeper
Gatekeeper is a security technology built into MacOS that makes sure only trusted software, approved by Apple runs on a Mac computer. When you download an app from a developer's website, Gatekeeper looks for the Notarization ticket (mentioned above) that is stapled to the app. If it finds a ticket, there is a bit of a "shake hands" process and Gatekeeper allows the application to be installed. If no ticket is found, the software will be identified as malware and flagged by your Mac as untrusted.
XProtect
XProtect is built-in malware protection much like Windows Defender on a Windows PC. Apple monitors for new malware infections and strains on a constant basis and issues updates to your Mac accordingly. In MacOS 10.15 or later, XProtect checks for known malicious content in the following three ways:
- When an application is first launched after it has been downloaded
- When an app has been changed in the filesystem
- When XProtect updates its signatures.
When XProtect finds malware, it blocks the offending software, warns the user, and gives you the option of moving the app to the Trash.
What if Malware Gets Through All of these Protections?
If somehow malware does make its way onto your Mac, XProtect still has you covered. With the updates delivered from Apple to your computer, XProtect can remove the infection. It can also remove infections at the time of a new XProtect update if you have a current infection. MacOS checks for these updates on a daily basis in order to keep your Mac safe and operating normally.
Does Your Mac Need Antivirus Software?
The short answer to this question is no, a Mac computer does not need external virus software protection. Apple does an incredible job of protecting its users from viruses and malware. Even with all of these safeguards built-in to a Mac computer, many people simply feel better using an extra layer of protection. Many computer users just feel safer with an additional antivirus software.
Ways To Further Secure Your Mac
Always Use the Latest Software with Software Update
It is hard to place enough emphasis on this point. One of the best ways, whether you use a PC or a Mac, to keep your computer safe from malware and viruses, is to always install the latest updates to your OS. Apple is constantly improving their software, and with that, comes additional protections from the latest online threats.
To check for the latest software update on your Mac, do the following:
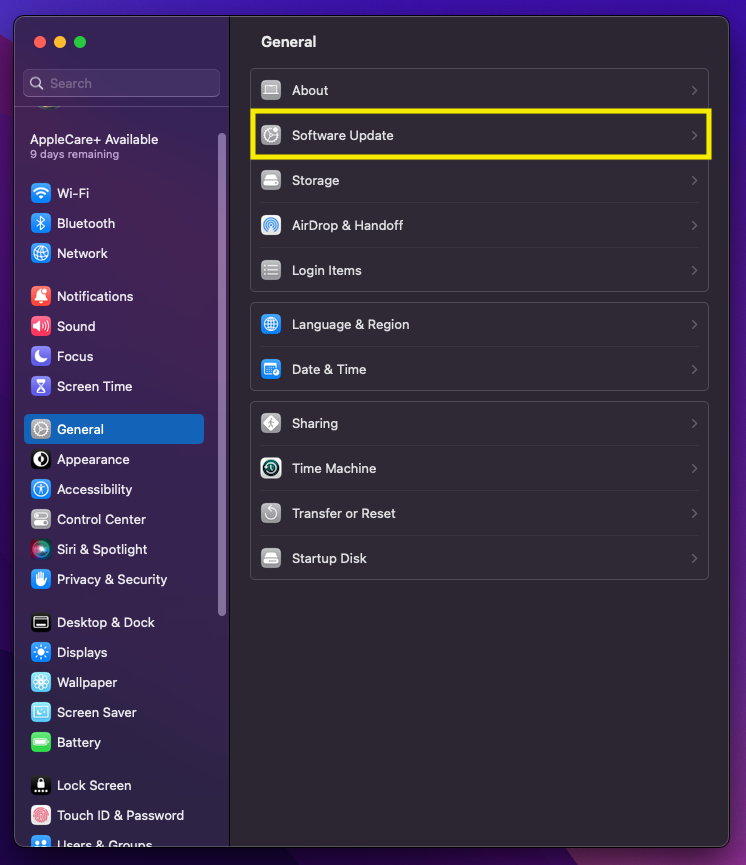
- Click the Apple icon in the top left corner of your Mac --> Click System Settings
- Click General --> Software Update
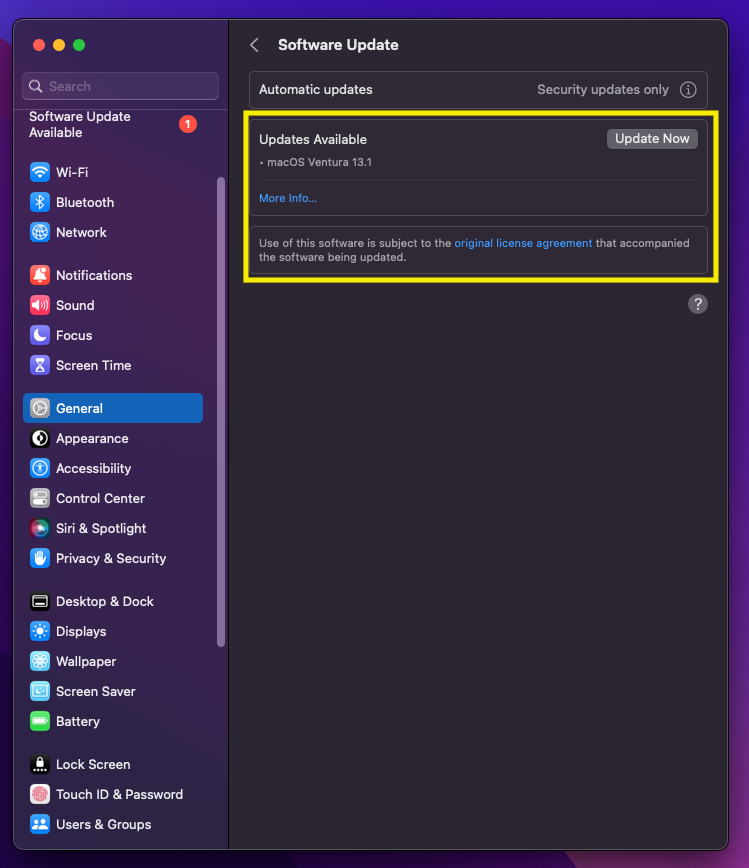
3. Your Mac will think for a moment while checking to see if there is an update to be downloaded and installed. Here we see there is an update.
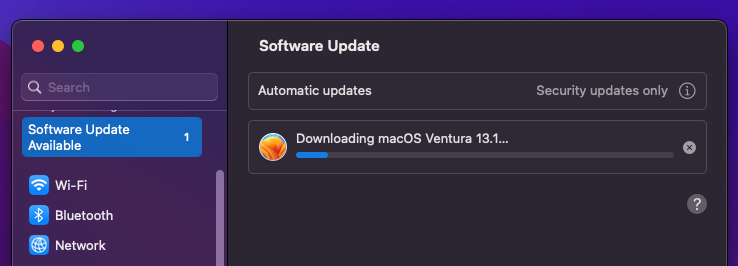
4. You will be asked to input your Mac credentials and agree to the software update. Once you do this, the update will begin downloading.
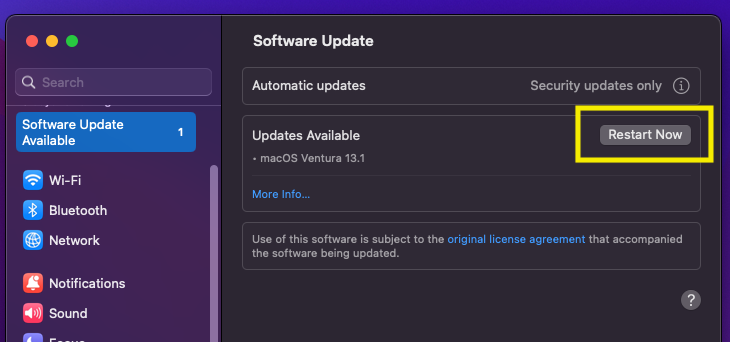
5. Finally, once the update is finished downloading, you will be asked to Restart your Mac.
Create Passkeys
Passkeys enable you to securely sign in to your MacBook or Mac (if you are using Touch ID on an Apple keyboard) without needing to remember a password. There are a few options for Passkeys:
- Touch ID
- Scanning a QR code with an iPhone or iPad
- Using an external security key
Most people choose to use Touch ID using their fingerprint to sign in to their Mac. This is a very secure login option and will prevent others from signing into your Mac and doing harm. You will usually be prompted to enable Touch ID when you are initially setting up your Mac, so take the time to add this layer of extra protection. It will help secure your Mac when its idle and you are away from it.
Set up Time Machine
Time Machine is the automatic backup capability built in to your Mac. It backs up your personal data, apps, music, photos, email, and documents to a storage medium of your choice - including iCloud. Backing up your Mac computer allows you to restore your computer and retrieve your files if you are unable to access them. This could be due to accidental erasure or deleting of files, corruption of files, or even having to re-install the OS.
You can set up Time Machine using these steps:
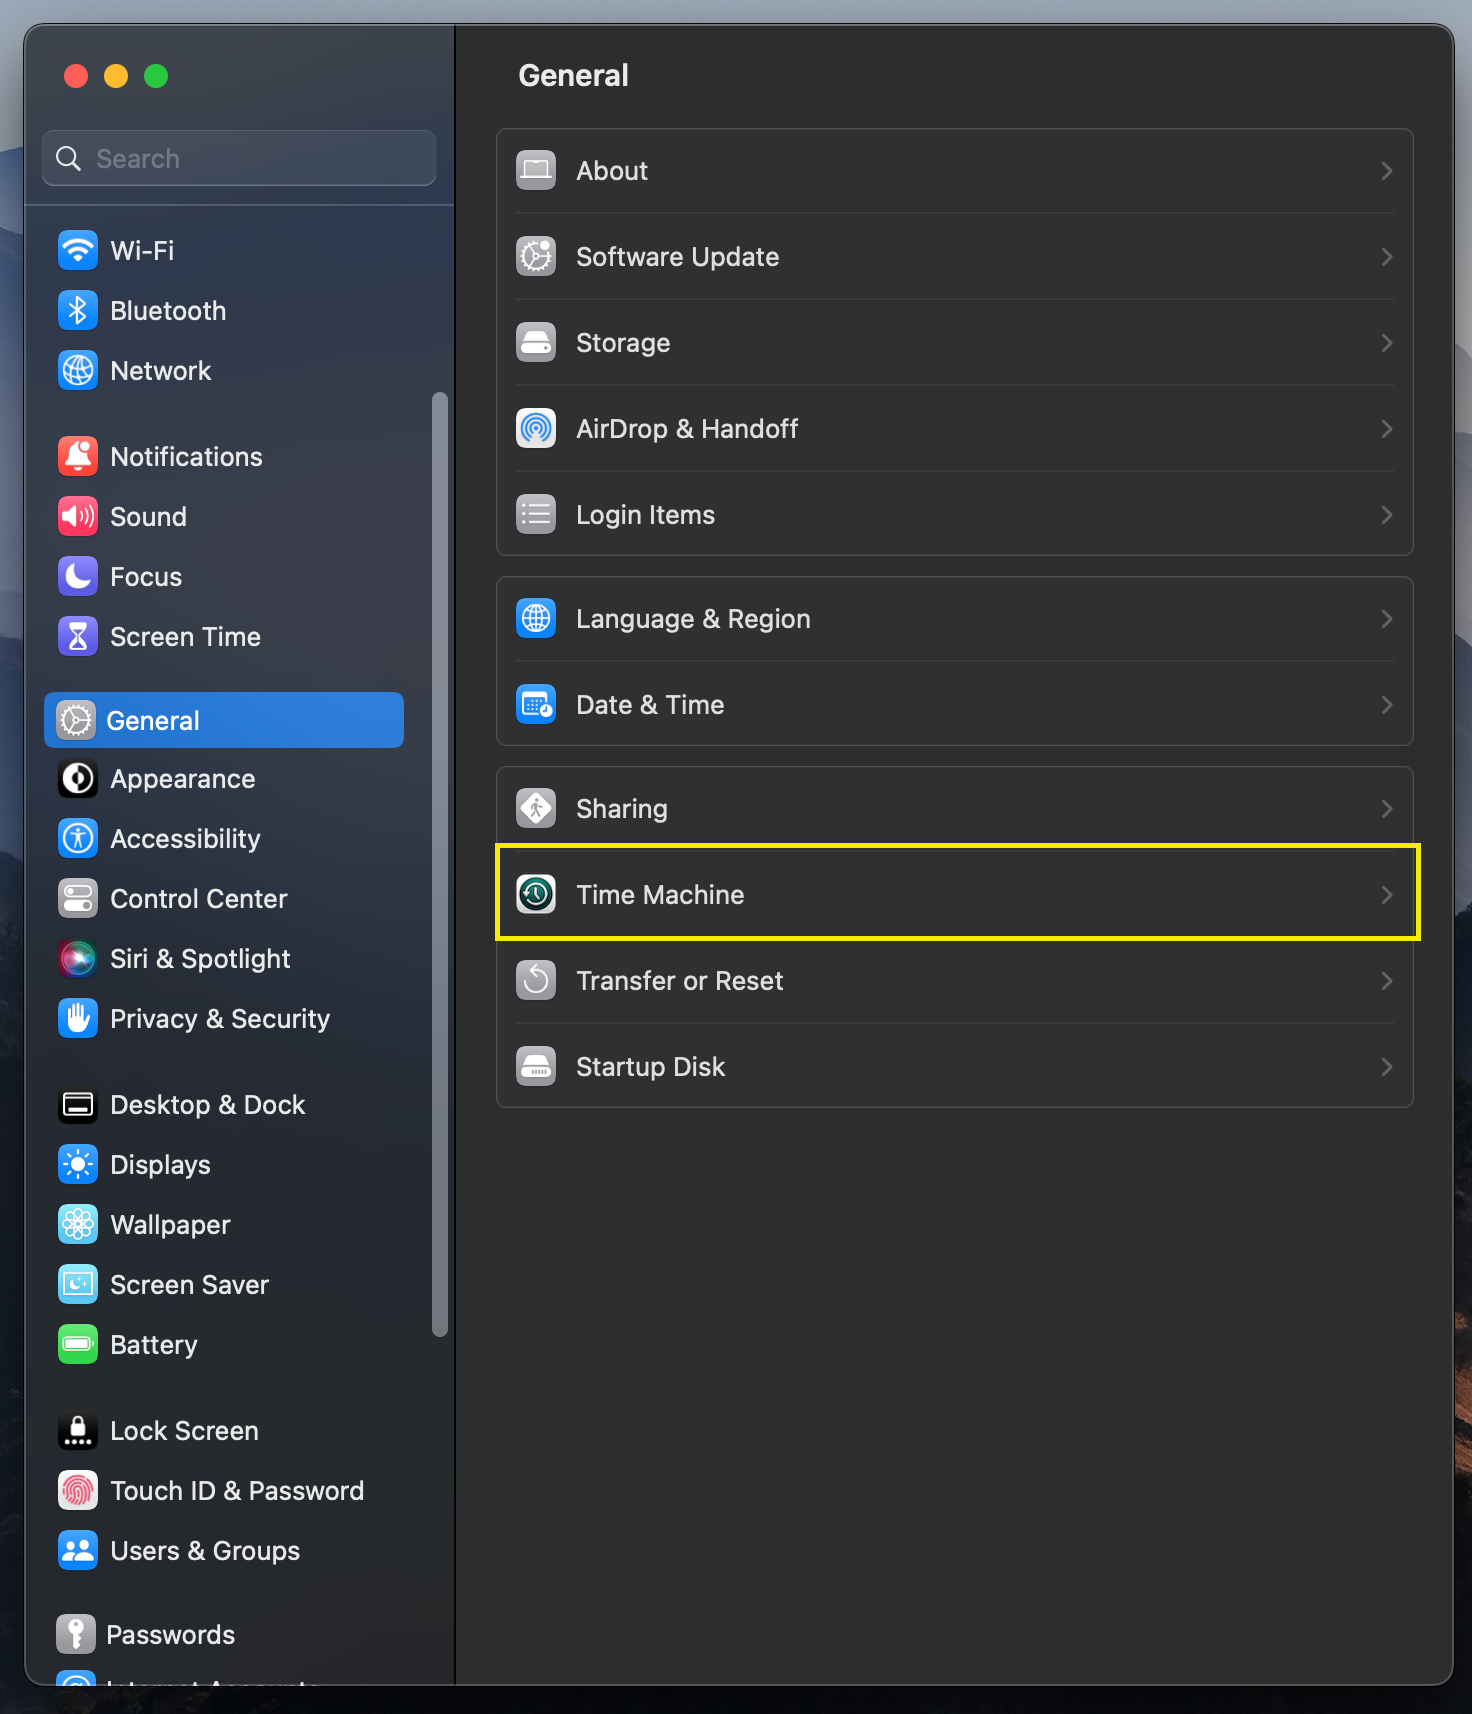
- Click the Apple icon in the top left corner of your screen --> click System Settings
- Click General in the sidebar
- Choose Time Machine
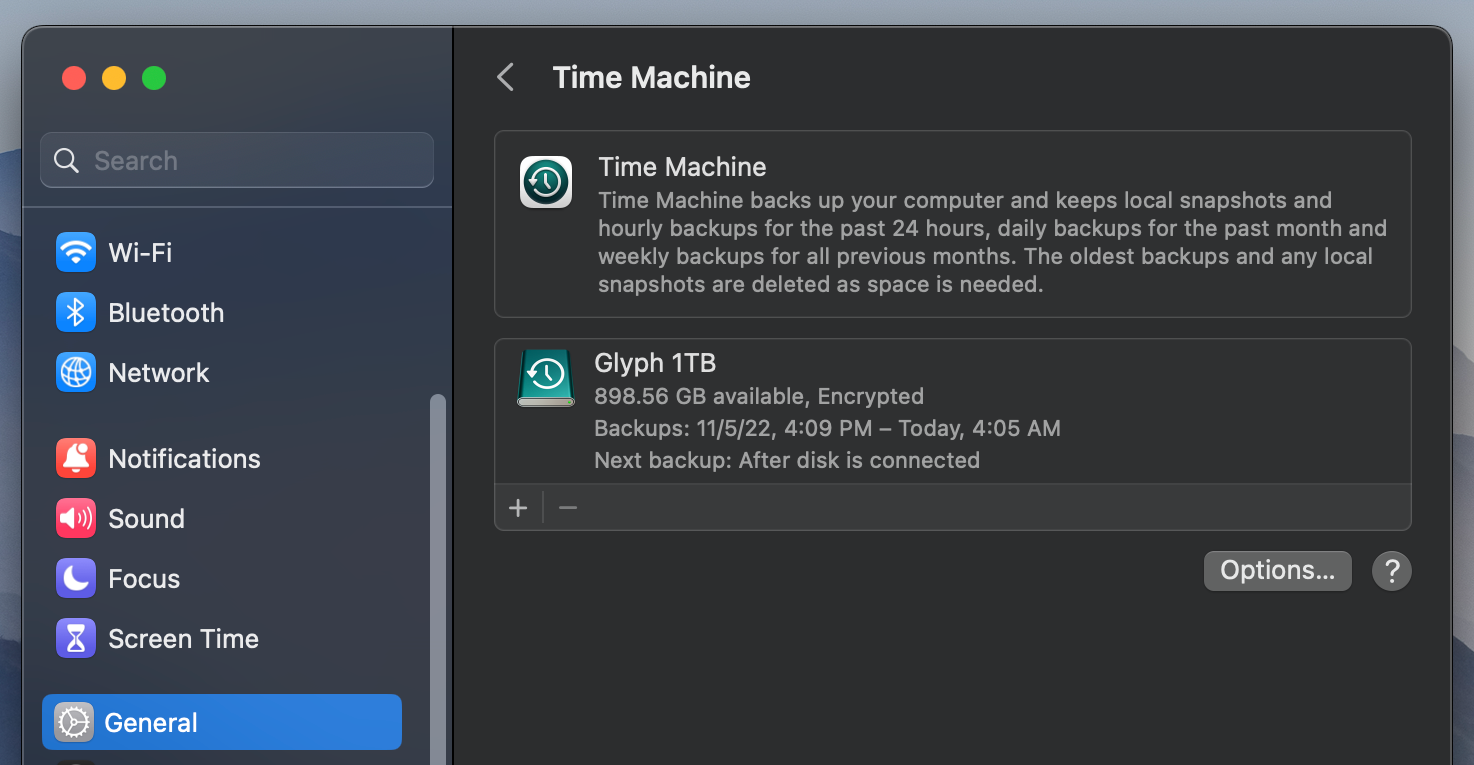
4. You will now be presented with external device options to use to store your Time Machine backups. Here we have a Glyph 1TB external drive already set up for Time Machine backups.
If you need to format a new hard drive for use with Time Machine, see our helpful guide for formatting an external drive for Mac:

Set Up and Use Find My
Finally, be sure to set up Find My, especially if you are using a MacBook Air or MacBook Pro that can be stolen or removed from its location easily. The Find My app makes it easy to locate your device if you lose track of it - even if it is offline.
To set up Find My, perform the following:
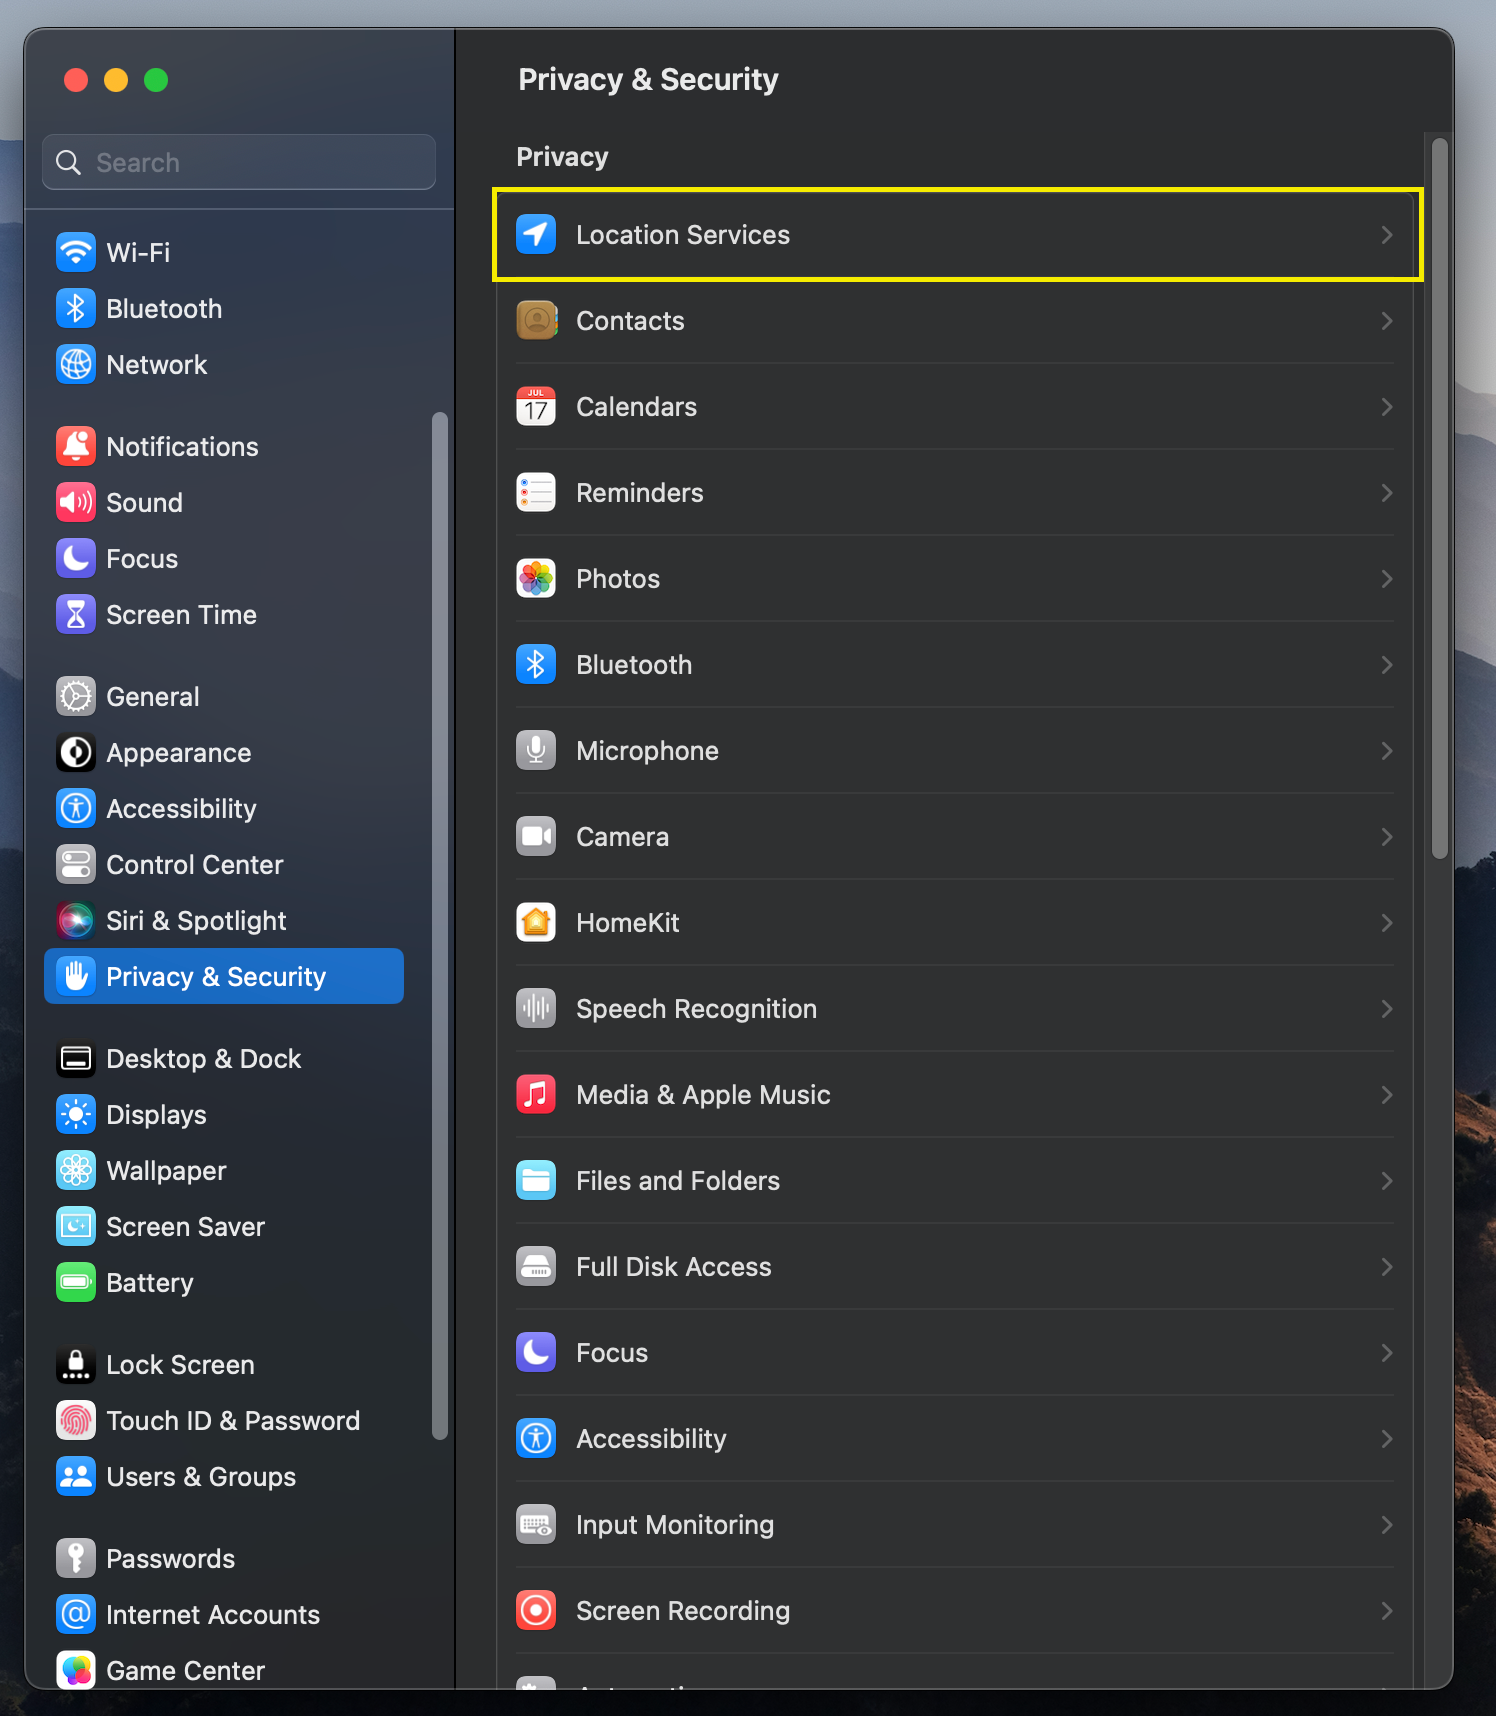
- Click the Apple logo in the top left corner of your screen --> click System Settings
- Click Privacy & Security
- Choose Location Services on the right side
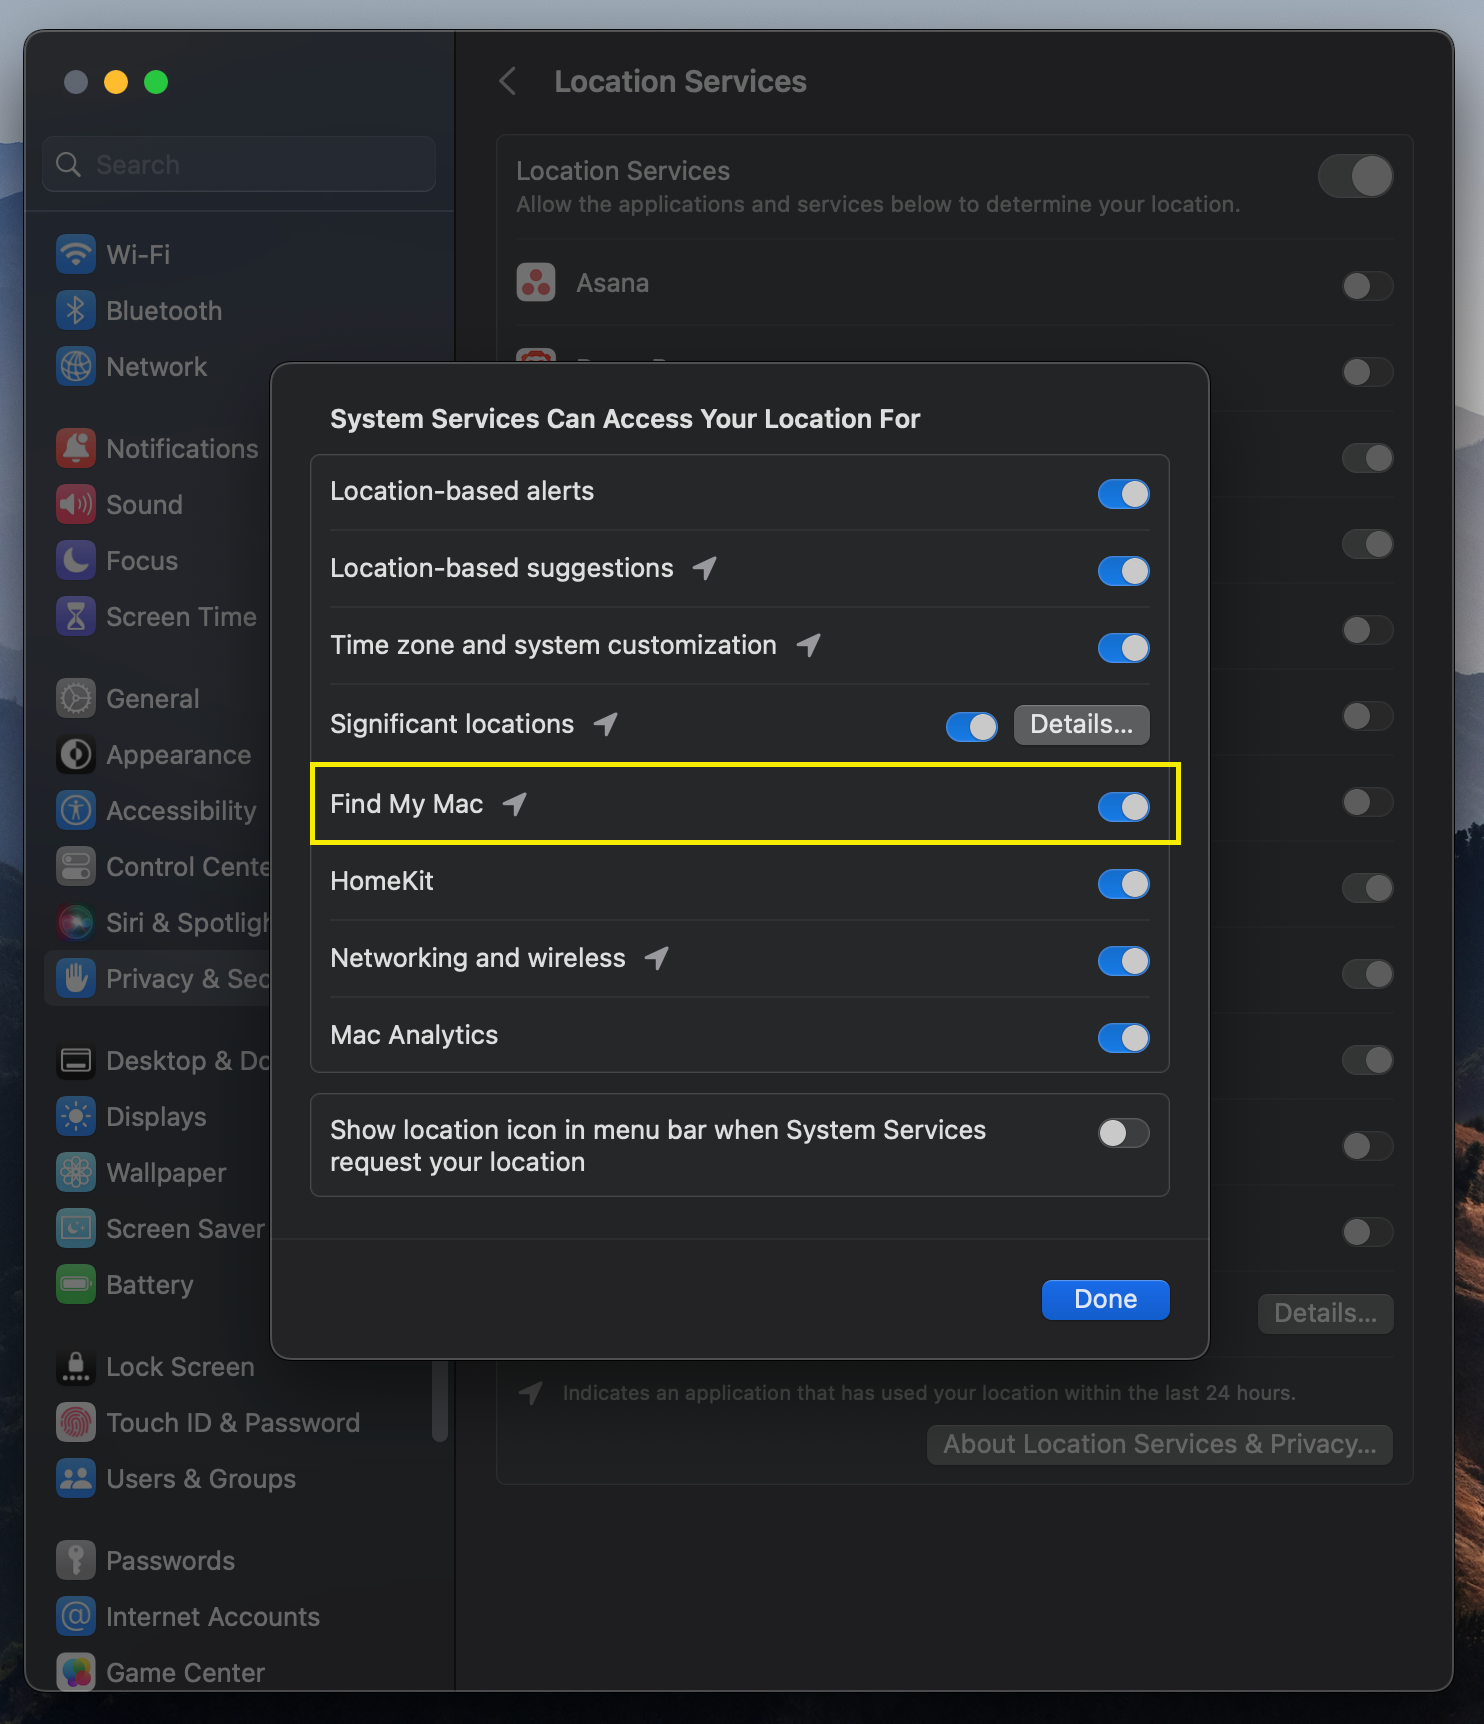
4. Next to System Services --> Click Details
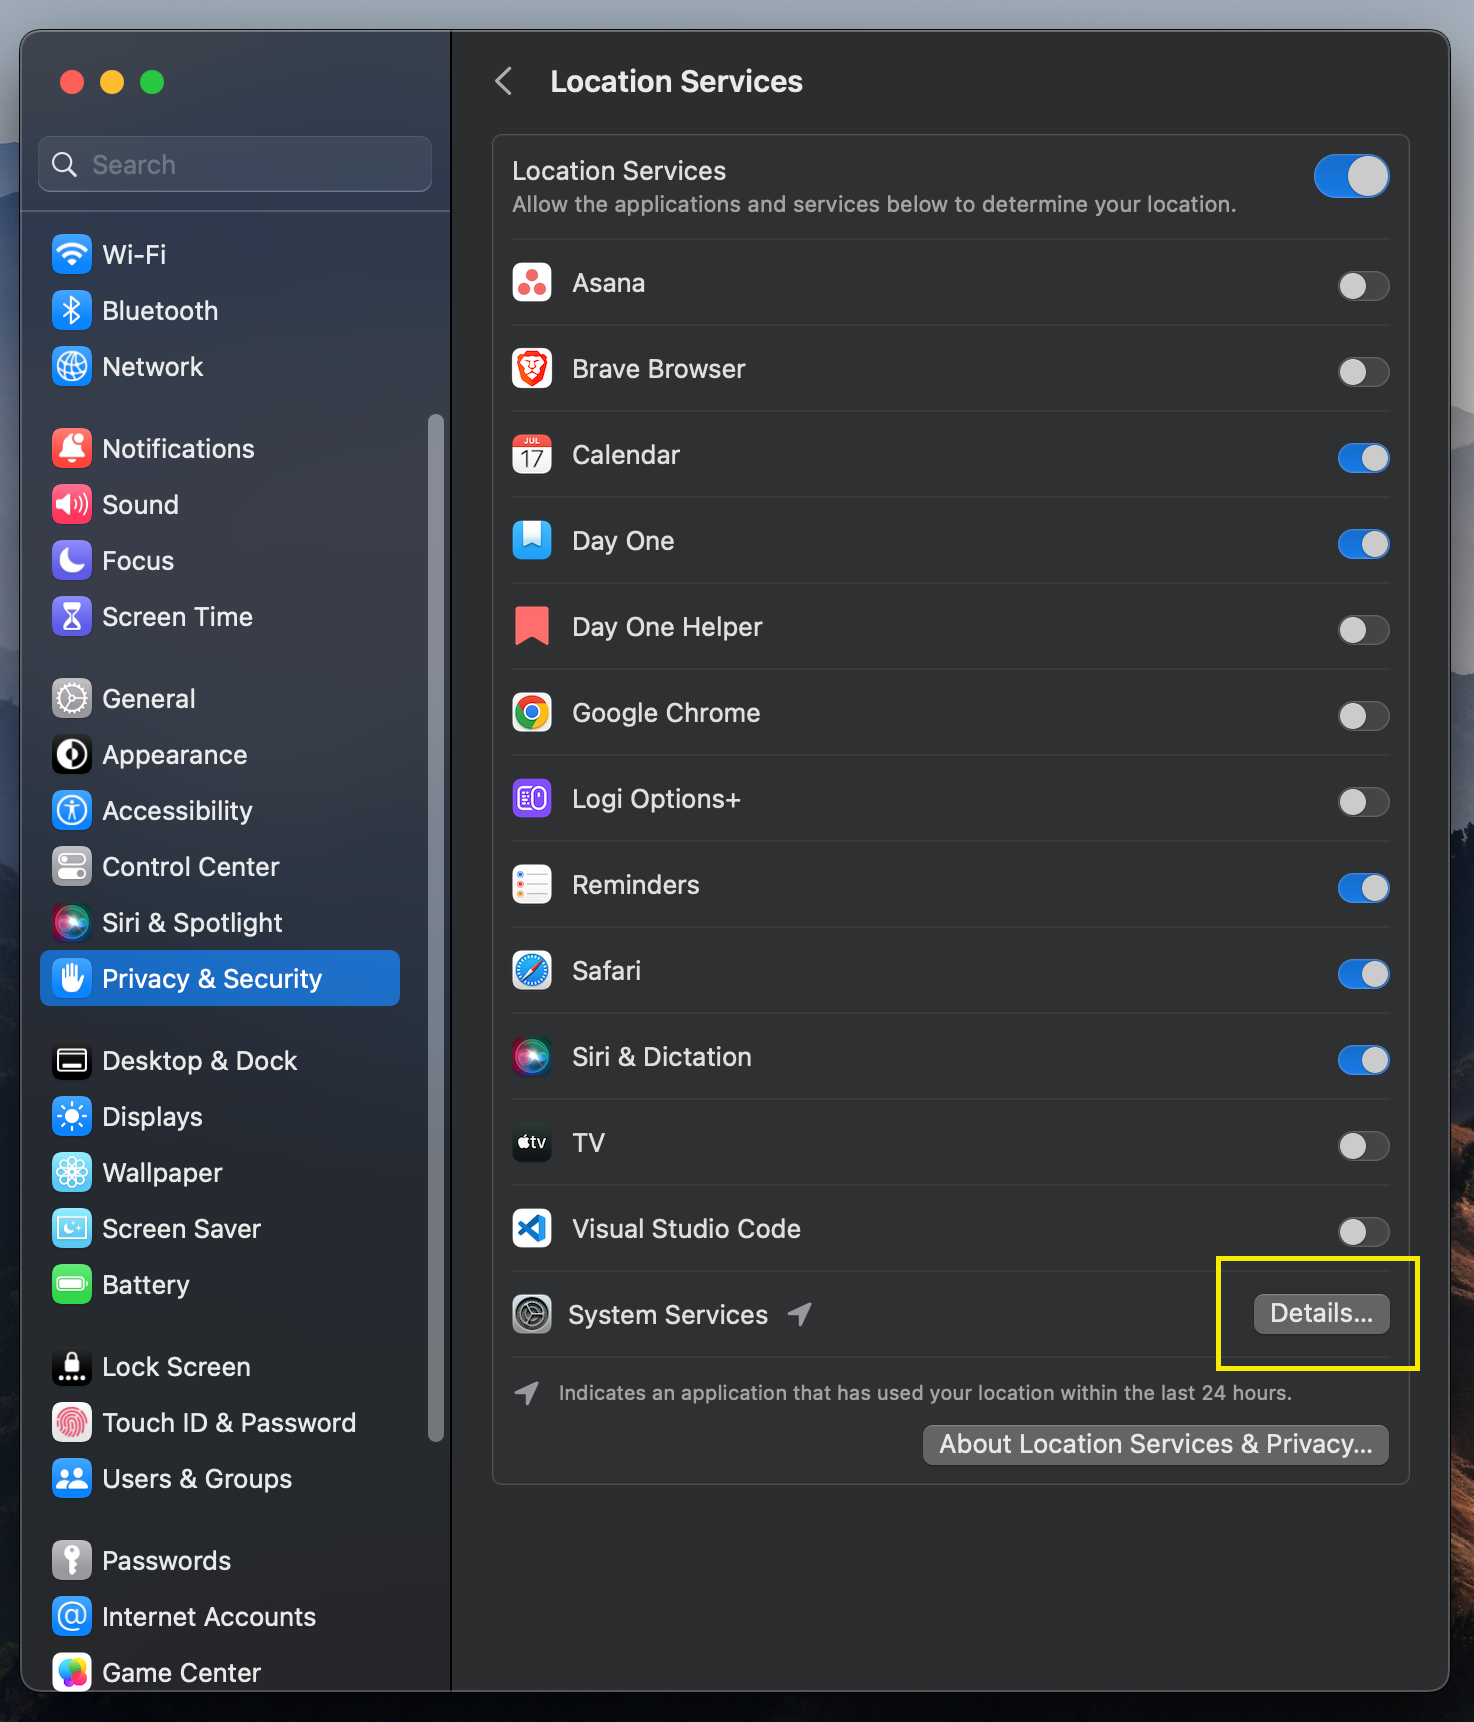
5. Make sure Find My Mac is switched to On
And that is all you need to do to enable Find My Mac!
We hope this guide has been helpful to you. Securing your Mac is very important and you want to take every step necessary to make sure your privacy is protected and your personal data remains safe.


